
VADA PAV- From the Kitchens of India
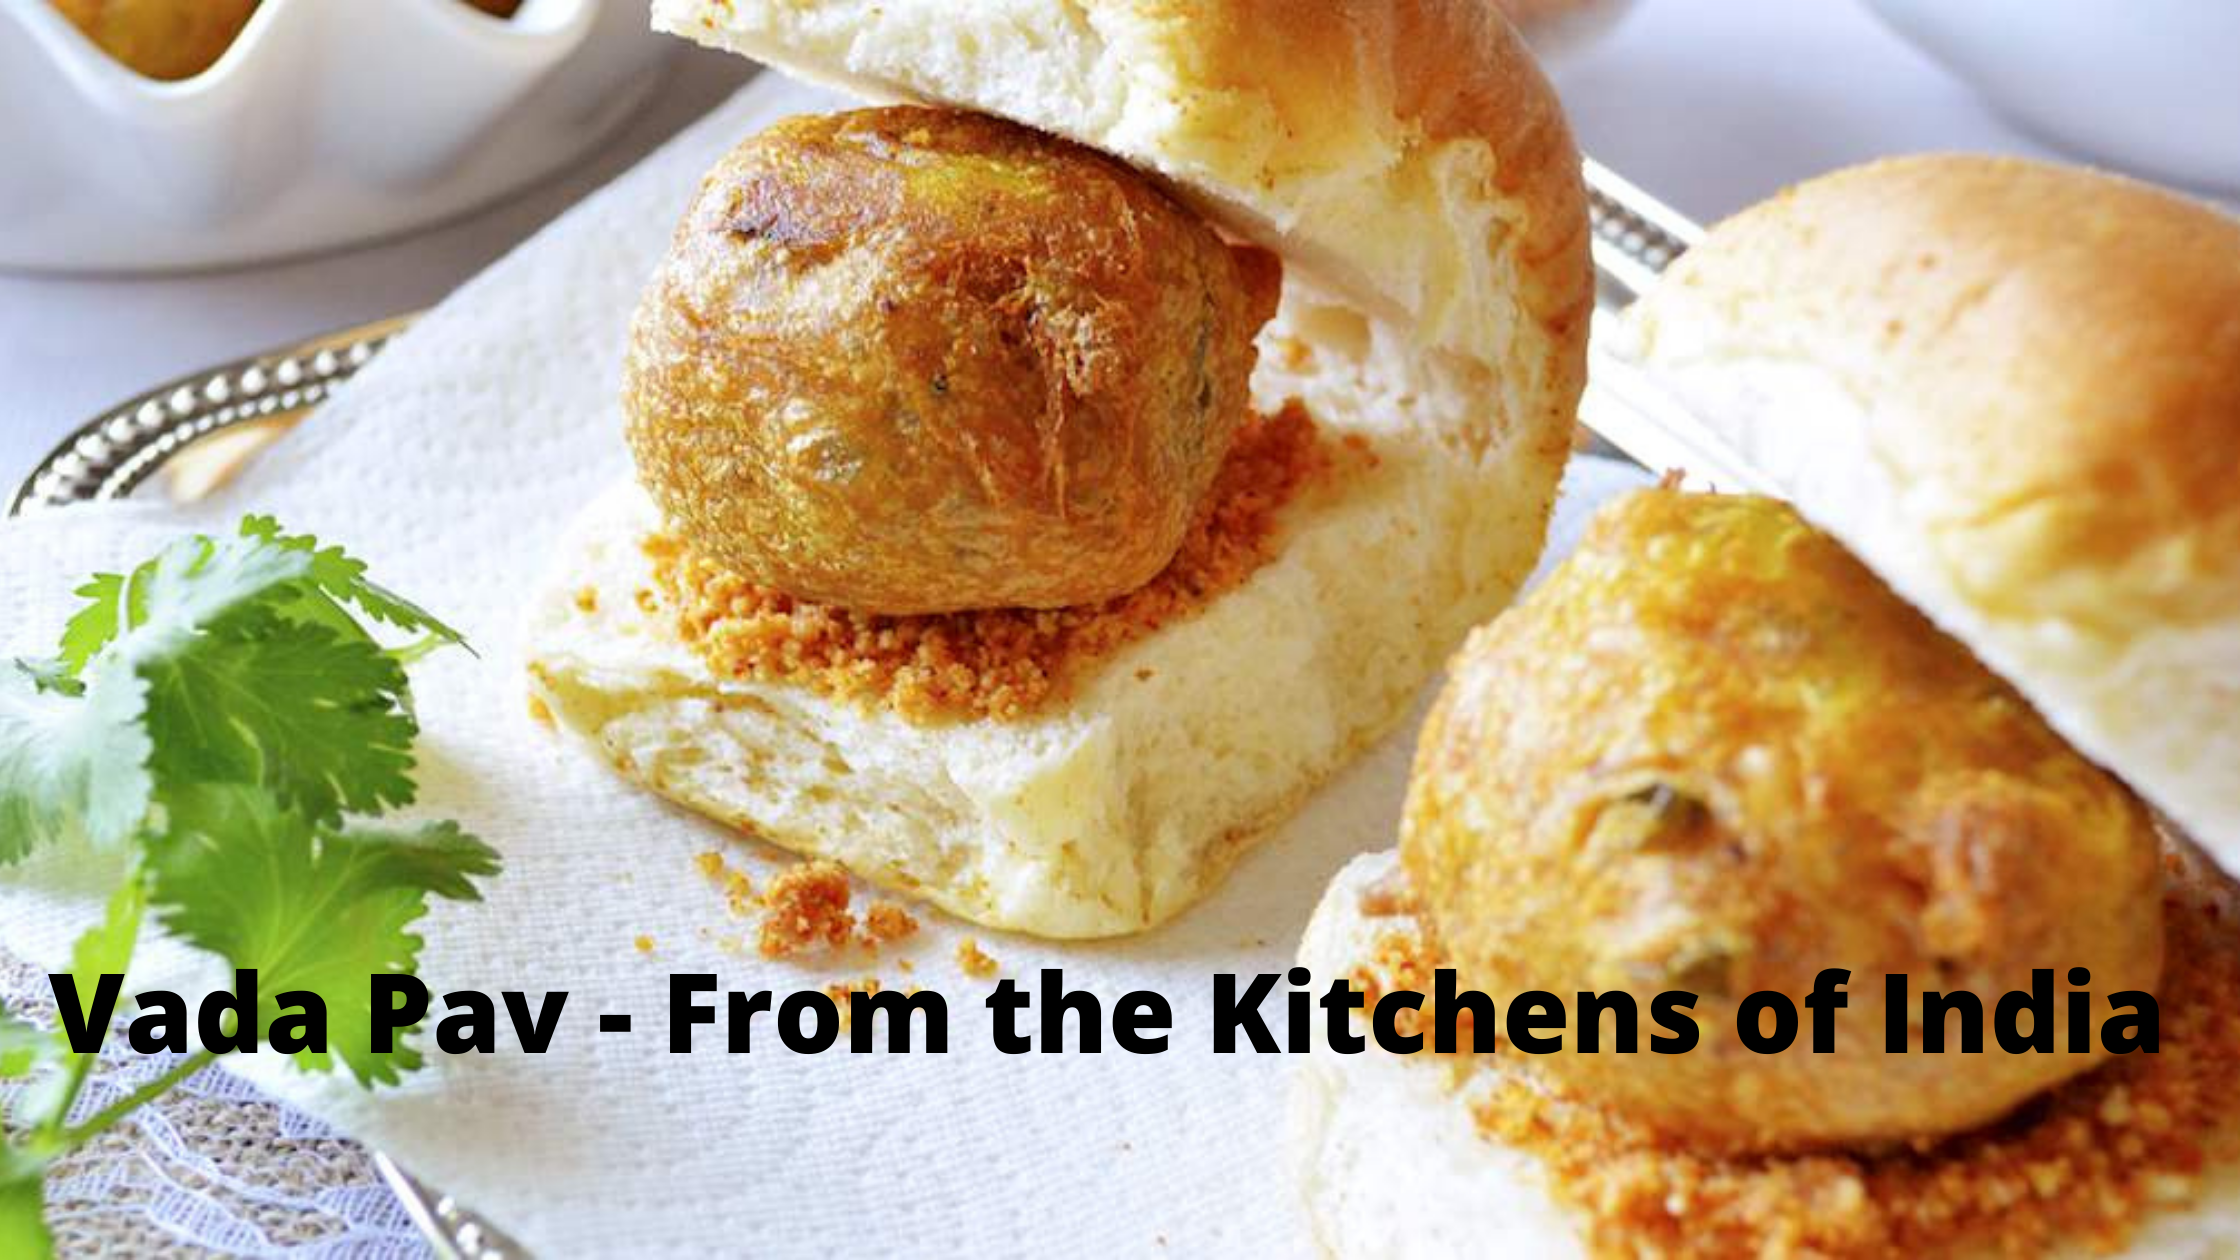
Vada pav is one of Mumbai’s favorite sandwiches, its name referring to the key ingredients: vada, or spicy mashed potatoes that are deep-fried in chickpea batter, and pav, or white bread rolls.
Who invented Vada Pav?
Iconic street food, Vada pav was invented by Ashok Vaidya at a stall outside Dadar railway station in 1966.
He thought of a way to satiate the hungry workers, and concluded that the ideal dish should be portable, affordable, and easy to prepare. Ashok made vada pav, and its popularity skyrocketed. The sandwich as an ideal working class snack.
Batata vada are fried batter coated potato dumpling fritters. The batter is made with nutty gram flour (besan) and spices. The filling consist of savory, spiced mashed potatoes, topped with sweet chutney, green chutney, and dry garlic chutney.
Batata means potato Marathi language. While the term vada mostly means a fried fritter or a fried dumpling-like savory dish.
Pav means a small loaf of bread in Indian and is the same as dinner rolls. They are made with all-purpose flour or whole wheat flour and can be bought from bakeries, super stores and sweet shops in India.
Vada pav can be eaten during any time of the day like breakfast, brunch, or in the evening as a snack. It goes very well with Indian chai, fried green chilies, and chutney like coriander chutney or mint chutney or green chutney.
The name Pav comes from the Portuguese word pão which means bread.
How to Make Vada Pav?
Making Potato Stuffing
1.Boil 2 large potatoes that weigh about 350 grams. Peel and then mash them with a fork in a bowl. You can boil or steam the potatoes in a pan, Instant pot or pressure cooker. Remember to drain the water very well from the boiled potatoes before you mash them.
Also crush 6 to 7 small/medium-sized garlic cloves and 1 to 2 green chilies in a mortar pestle.
2.Heat 2 to 3 teaspoons of oil in a small pan. Add ½ a teaspoon of mustard seeds and crackle them. Then add 7 to 8 curry leaves and a pinch of asafoetida (hing). Stir and sauté for about 5 seconds.
3.Add the crushed garlic cloves and green chilies mixture to the pan. Add ⅛ teaspoon of turmeric powder (about 2 to 3 pinches).
4.Stir for some seconds or until the raw aroma of garlic goes away.
5.Pour this tempering mixture together with the oil to the mashed potatoes.
6.Add 1 to 2 tablespoons of chopped coriander leaves and salt as required.
7.Mix everything well. Then make small to medium balls from the mashed potato mixture. Flatten these balls a bit. Cover and keep aside.
Making Batter
8.In another bowl, make a smooth batter from 1 to 1.25 cups besan (gram flour), ⅛ teaspoon turmeric powder (about 2 to 3 pinches), a pinch of asafoetida (hing), a pinch of baking soda (optional), salt and ½ cup water or as needed. The batter should have a medium-thick flowing consistency. It should not be too thick or thin. If the batter becomes thin, add 1 or 2 tablespoons of gram flour. If the batter becomes thick, then add 1 or 2 tablespoons of water.
9. Dip the slightly flattened potato balls in the batter and coat it evenly with the batter.
Frying Batata Vada
10.Before you dip the batata vada in the batter, heat oil in a pan or wok (kadai). When the oil becomes hot then dip the batata vada in the batter to coat as shown in the above steps. Carefully and gently drop these batter coated potato balls in medium hot oil.
11.Depending on the size of the kadai or pan, you can add more or less of the vada while frying. But don’t overcrowd the pan
12.When one side firms up, becomes slightly crisp and golden then only turn over gently with a slotted spoon. Fry the second side. This way deep fry them till golden, turning a couple of times as needed.
13.Drain them on kitchen paper towels. Make all batata vada this way and set aside.
Assembling Vada Pav
14.Serve them when they are still hot or warm. Put all the chutneys and pav on your work surface. Slice the pav without breaking it into two parts and set aside. If you don’t have sweet chutney, then make the vada pav with green chutney. The green chutney and sweet chutney recipes are in the recipe card below. You can make these two chutney recipes some hours ahead or a day before and refrigerate.
15.Spread both the green chutney and sweet chutney on the sliced pav. You can also spread green chutney on one side and sweet chutney on the other side.
16.Sprinkle the dry garlic chutney on the pav. This step is optional and you can skip it if you don’t have garlic chutney.
17.Place the hot batata vada in the pav (bread) slices.
18.Serve vada pav immediately or else the pav becomes soggy. You can also serve some salted fried green chilies and both of the chutneys with it.
How to Make Pav?
1.In a bowl take 1 cup of all-purpose flour, yeast and sugar.
2.Add 1 cup warm water.
3.Stir or whisk to make a smooth thick batter.
4.Cover and keep the bowl for 30 to 40 minutes till you see a bubbly & frothy mixture. The batter would also have risen. The below pic shows the consistency. This is the sponge starter.
5.Add oil, salt and 1 cup flour.
6.Mix with a spoon or spatula.
7.Add 1 cup flour again.
8.Mix and then begin to knead. If the dough appears sticky then you can add about ¼ to ½ cup flour. The proportion of water to be added depends on the quality of the flour. Overall I added 3.25 cups flour and 1 cup water.
9.Knead to a smooth pliable dough.
10.Spread oil or butter all over the dough. Cover the bowl with a kitchen cotton napkin or a lid and keep the bread to leaven for 20 to 25 minutes. The leavening time depends on the type of yeast used & the temperature conditions. For instant and fresh yeast, 20 to 25 minutes of the first rise is enough. For dry active yeast, you will have to keep for about 45 minutes to 1 hour or more.
11.The risen & doubled pav dough.
12.Gently punch and deflate the dough and form a log.
13.Slice the log into equal sizes.
14.Take each slice and roll between your palms to get a smooth round roll.
Baking Pav
15.Make rolls and place them in a greased tray keeping 1 inch space between all of them. Cover and allow the second rise for 25 to 30 minutes. The small loaves would increase in size.
16.Then brush the pavs buns with some milk. This gives a golden color to laadi pav.
17.Place the baking tray with the pavs in a preheated oven at 200 degrees celsius for 25 to 30 mins or till the tops turn golden and the pavs sound hollow on tapping.
18.Remove the pav buns from the tray and place on a wired rack or tray, so that they don’t become softened and moist from the bottom due to heat condensation. Brush melted butter or spread softened butter on top of the pavs for a glaze. This is an optional step.
19.Serve the pavs warm or at room temperature
Dry garlic chutney
Dry garlic chutney recipe with step by steps. Spicy and piquant is this chutney made from garlic and coconut. This is a Maharashtrian recipe of dry garlic chutney also known as Lasun khobra chutney. It takes about 15 to 20 minutes right from start to finish to make this chutney. So it’s very easy and less time consuming.
Ingredients
1 teaspoon oil – can use peanut oil or sunflower oil
8 grams garlic or 22 to 24 small garlic cloves or 1 tablespoon small garlic cloves
2 teaspoons white sesame seeds
½ cup desiccated coconut
1 tablespoon Kashmiri red chilli powder or add as required
½ teaspoon salt or add as per taste
Instructions
Sautéing Dry Garlic Chutney Ingredients
Heat 1 teaspoon oil in a small iron kadai or a heavy pan. Heat the oil at a low flame.
Add the garlic cloves.
Mix and sauté for about 30 to 40 seconds.
Next add 2 teaspoons white sesame seeds.
Sauté for about 15 to 20 seconds or till the sesame seeds change color.
Switch off flame. Add ½ cup desiccated coconut. mix very well.
Then add 1 tablespoon Kashmiri red chilli powder. You can reduce the amount of kashmiri red chili powder if you want as 1 tablespoon gives a spicy taste.
Then add ½ teaspoon salt or add as per taste.
Mix again and let this mixture cool down.
Making Dry Garlic Chutney
When the mixture has cooled down completely, add in a small dry grinder jar.
Grind in intervals of 4 to 5 seconds and stop. Do not grind at a stretch as then oil will be released from the coconut and sesame seeds. You can even use pulse option of the mixer-grinder. Grind to a coarse or semi-fine mixture. Spoon the dry garlic chutney in a small glass jar or bowl. Cover tightly and refrigerate.
Serve dry garlic chutney as required with Vada pav.
Tips
•When frying batata vada the oil should be moderately hot at a temperature of 180 to 190 degrees Celsius (360 degrees to 375 degrees Fahrenheit). You can use a candy or deep-fry thermometer to check the temperature of the oil.
•Alternatively, you can add some droplets of the batter to the oil. If the droplets rise to the surface gradually and start bubbling then the oil is ready. However, if the droplets rise slowly or get submerged inside then the oil is not hot enough. If the droplets rise too quickly and get burnt or browned then the oil is too hot.
•When batata Vada is fried in oil that is too hot, it remains undercooked on the inside and burnt and overcooked on the outside. Frying them in oil that is not hot enough causes them to absorb more oil and become soggy and oily.
•You can alter the amount of spices as per your taste preference. In some Maharashtrian cities like Kolhapur, the Vada pav served in the street is very spicy. My recipe does not make for a spicy Vada pav. If you want to make it spicy then add more green chilies.


Very well written story. It will be beneficial to everyone who employess it, as well as yours truly :). Keep doing what you are doing – looking forward to more posts.
I am continuously searching online for ideas that can facilitate me. Thx!
Loving the information on this internet site, you have done outstanding job on the posts.
I would like to thnkx for the efforts you have put in writing this blog. I am hoping the same high-grade blog post from you in the upcoming as well. In fact your creative writing abilities has inspired me to get my own blog now. Really the blogging is spreading its wings quickly. Your write up is a good example of it.
Thankyou for this wondrous post, I am glad I found this website on yahoo.
I felt the excitement building as I read — fantastic job!